September 30, 2010

Fursecuri cu untura/ Romanian Lard Christmas cookies


(Please scroll down for English version)

Mai sunt 3 luni pana la Craciun, si desi este sarbatoarea mea preferata, nu vreau sa ma grabesc, dar canalul TV Cooking Channel a lansat o provocare pentru prajiturelele de Craciun, si am vrut sa particip.

Am facut aceste fursecuri pe care mama le face iarna, si pentru ca mama nu masoara ingredientele a trebuit sa incerc 3 variante pana am gasit combinatia perfecta intre grasime si faina.

Romanii taie la fiecare Craciun un porc. Parintii mei cresc intotdeauna un porc pe care il taie cu cateva zile inainte de Craciun, in ziua de Ignat pe 20 decembrie. Imi aduc aminte cum guita porcul cand il scoteau din cotet, dar suferinta ii era scurta. Copiilor le place sa se urce pe el si sa il calareasca putin. Apoi porcului ii este curatata pielea, arsa prima data (cu paie, sau mai modern cu arzatorul cu gaz), ca tot parul sa fie ars si in acelasi timp pielea sa fie coapta, apoi spalata cu apa calda. Asa de bun este soriciul, poate cea mai buna parte din acea zi.

Urmeaza transarea, cand se pun separat sunca, coastele, muschiul, si matele pentru carnati. Mama punea separat grasimea curata (osanza) pentru a fi folosita in special la prajituri: fursecurile de mai jos si un aluat foietaj facut cu osanza. Dupa ce treaba era terminata, urma pomana porcului, o mica friptura cu salata de varza acra (si ma apuca o pofta in timp ce va povestesc asta :)) Stiu ca e in post, dar pomana porcului era o mica exceptie, fiind singura masa cu carne mancata inaintea zilei de Craciun.

Cam asa aratau zilele de dinaintea Craciunului la noi acasa, pregatind porcul, facand curat in casa, apoi impodobitul bradului si in dimineata zilei de Craciun foarte devreme ascultand minunatele colinde si privind clipocitul celor 7 stelute din brad.

Fursecurile se pot face in orice forma, mie imi plac sub forma de floricica, cu nuca sau rahat in mijloc (asta era partea mea favorita, sa ajung in mijloc la nuca coapta). Sunt bune proaspete, dar si mai bune in zilele urmatoare.


Later edit: Reteta mea a fost castigatoare si a fost publicata pe site-ul cookingchanneltv.com, alaturi de retetele unor bucatari celebri.

Ingrediente (pentru aprox 25 bucati):

400 gr faina (3 cani de 250 ml)
200 gr zahar (1 cana)
200 gr untura (1 cana)
1 ou
coaja rasa de la 1/2 lamaie
1/2 lingurita nucsoara macinata
100 ml apa (1/2 cana)
1 lingurita praf de copt (1 pachet)
vanilie
un praf de sare
cateva nuci si rahat pentru decorat
zahar pudra pentru decorat

Se incinge cuptorul la 180 grade Celsius (350 Fahrenheit).

Intr-un castron mai mare se pune faina, zaharul, untura, coaja de lamaie, oul, nucsoara, apa, vanilia, praful de copt si sarea si se amesteca (cu mana, sau se poate folosi mixerul) pana cand devine o coca mai groasa. Eu am folosit un pos mare si am format floricele, dar puteti face orice forma doriti, bastonase, semilune. In mijlocul fiecarei floricele am pus o bucatica de nuca sau de rahat si am apasat putin.


Se pun fursecurile in tava neunsa (se poate tapeta tava cu hartie de pergament), lasandu-se 2 cm intre ele. Se baga la cuptor pentru 25-30 minute. Se scot, se lasa sa se raceasca si se pudreaza cu zahar.

Pofta buna!


There’s still 3 months left until Christmas, and even it’s my favorite holyday I’m not in a hurry. But, Cooking Channel launched a challenge for Christmas cookies and I wanted to participate.

I made these cookies that my mom makes during winter, and because my mom doesn’t measure the ingredients, I had to make it 3 times until I found the perfect ratio between flour and fat.

The Romanian tradition requests to sacrifice a pig before every Christmas. My parents raise and cut a pig few days before Christmas, on Ignat day on December 20th. I remember how the pig was crying when they were taking him out of the barn, but he suffered only for a very short time. The kids loved to ride the pig before he got cleaned. The pig’s skin will be cleaned, first burned until all the hair is gone and the skin is cooked, and washed with warm water after that. That fresh skin is so good, the best part of the day.

Next, the bacon and the meat will be separated, the ribs, and the intestines, which after a good cleaning will be used as sausage casings. My mom will select the clean fat that’s going to be used for cookies and for lard puff pastry. After everything was done, we had a little meal with fresh fried meat and homemade sauerkraut salad (and I’m getting some cravings when I’m writing this :)). The days before Christmas we usually fast (no meat, eggs or dairy) but this meal was a little exception.

That’s how the days before Christmas looked like in my house growing up, preparing the pork’s meat, making homemade sausages, cleaning the house and putting up the Christmas tree. And very early in the Christmas day we listened to beautiful carols and watching the glistening of the 7 lights from the Christmas tree.

The lard cookies can be made in any shape; I like the flowery shape, with a walnut or a piece of Turkish delight in the middle (my favorite part was to get the roasted walnut). And they’re good fresh, and even better in the next days.

Ingredients (for about 25 pieces):

3 cups all purpose flour
1 cup sugar
1 cup lard
1 egg
The zest from ½ lemons
½ tsp ground nutmeg
½ cup water
1 tsp baking powder
1 tsp vanilla extract
Pinch of salt
Walnuts, Turkish delight or slivered almonds for decoration
½ cup powder sugar for dusting

Preheat the oven at 350 degrees.

In a large bowl mix the flour, sugar, lard, lemon zest, egg, nutmeg, water, vanilla, salt and baking powder and mix (with your hands or you can use a mixer) until a thick dough forms. I used a pastry bag to make flowers, but you can make any shape you like. Place a piece of walnut or Turkish delight in the middle of each flower and press a little.


Line the cookies on a baking sheet (ungreased, or lined with parchment paper), leaving 1 inch space in between. Bake in the preheated oven for 25-30 minutes. Remove, let cooled down and dust with powdered sugar.

Enjoy!

September 29, 2010

Ciuperci cu ceapa si ardei/ Oisters Mushrooms sautee with onions and peppers


(Please scroll down for English version)

"Peste dealuri zgribulite,
Peste tarini zdrentuite,
A venit asa, deodata,
Toamna cea intunecata.
.....................
Cri-cri-cri,
Toamna gri,
Nu credeam c-o sa mai vii
Inainte de Craciun,
Ca puteam si eu s-adun... "
(
Balada unui greier mic de George Toparceanu)

Imi place toamna, cu toate recoltele ei, dar adevarul este ca toata vara mi se parea ca toamna nu o sa mai vina, sau cel putin nu asa curand. Cu un singur drum ramas la ferma anul asta, iar piata o sa se inchida in cateva saptamani, iarna isi anunta aparitia cat de curand. Eh, cumva o sa trecem noi si de iarna asta :)

Vreau sa profit din plin de belsugul toamnei, si saptamana trecuta la piata am gasit niste ciuperci stridie, de care nu am mai mancat pana acum. Erau asa frumoase, incat am cautat o reteta care s-a dovedit delicioasa. Cand nu o sa mai gasesc ciuperci proaspete o sa incerc sa le inlocuiesc cu ciuperci de padure uscate si rehidratate.


Multi spun ca ciupercile nu se spala, pentru ca absorb multa apa, si se sterg cu un prosop umed. Eu le spal sub un jet rapid de apa, si apoi le sterg prin tamponare.

Ingrediente:

1/2 ceapa mica taiata solzisori
1/2 cana ardei gras rosu taiat felii subtiri
2 cani ciuperci stridii (palarii si picioare) rupte fasii
1 catel de usturoi
cimbru proaspat
sare si piper dupa gust
2-3 linguri ulei de masline
4 linguri de vin alb

Se incinge uleiul intr-o tigaie, se adauga ceapa si ardeiul. Se calesc pana se rumenesc, 2-3 minute. Se adauga ciupercile si se calesc si ele cateva minute, pana se fac rumene (tigaia nu trebuie aglomerata, folositi cea mai mare tigaie pe care o aveti).
Se stropeste cu cele 4 linguri de vin si se lasa pana scade vinul. Se adauga usturoiul dat pe razatoarea mica si cimbrul si se potriveste cu sare si piper.
Simplu si bun. Daca omitem vinul, o delicioasa gustarica de post.

Pofta buna!


There is a beautiful Romanian poetry about fall coming so sudden over a little cricket. He never thought that the fall will come before Christmas, so he never stocked any food for the winter. Poor cricket :)

Now, I like fall with all her harvest, but all summer seemed that the fall is so far away. With one trip left to the farm for this year, and the farmers market is going to close in few weeks, the winter is almost here. Eh, in a way or another will pass this winter :)

I want to take full advantage of this fall harvest, and I found at the farmers market last week these beautiful oyster mushrooms, which I never had before. I looked up a recipe which turned up delicious. When I’m not going to be able to find fresh mushrooms, I’ll try to replace it with dried and rehydrated mushrooms.

A lot of people don’t wash the mushrooms, because they absorb a lot of water, and they just wipe it with a damp cloth. I like to wash the mushrooms very fast in running water and pat them dry with paper towel.

Ingredients:

1 small onion julienned
½ cup red bell pepper julienned
2 cups oyster mushrooms shredded in large pieces
1 garlic clove grated
1 tbsp fresh thyme
Salt and pepper
2-3 tbsp olive oil
¼ cup white wine

Preheat the oil in a large pan (the vegetables shouldn’t be crowded) and add the onions and peppers. Sautee 2-3 minutes until golden brown. Add the mushrooms and sauté until they get golden brown too. Add the wine and cook until evaporates. Add the garlic clove and the thyme and check for salt and pepper.

So simple and so good.
Enjoy!

September 25, 2010

Povestea unei retete/ A recipe story

(Please scroll down for English version)

O prietena m-a intrebat odata de unde imi vin ideile. De peste tot. De multe ori de la televizor, sau din vreo revista. De pe internet, sau o reteta romaneasca pe care nu am mai mancat-o de mult. Ideea imi vine subit, cand sunt la servici, si se aprinde beculetul :) Sau vine mai lent, gandindu-ma ce sa fac cu un anumit ingredient din frigider.

Daca reteta exista deja, o iau ca atare, sau o modific, in functie de ce imi place, sau ce ingrediente am. Daca exista ingredientul, caut retete pe internet sau le combin.

Apoi vine ziua gatirii propriu zise. De cele mai multe ori ies victorioasa. Cateodata nu. Sau nu bun deajuns sa ajunga pe blog.

Dupa gatit urmeaza asezarea pe farfurie sau castron, pentru poza (dupa ce am gustat, binenteles, sa nu fac pozele degeaba) si cautarea unui loc luminos. Cu putin aranjament sa dea bine in poza. Si pozele propriu zise. Ce credeti ca urmeaza? Mananc respectiva mancare :)

Pozele asteapta cuminti in calculator pana cand am timp sa le postez.

Momentul postarii vine cu ideea ce am sa spun gata pregatita. Cateodata. Cateodata ma asez in fara calculatorului, scriu titlul si ma gandesc ce sa scriu si cum sa incep.

Si asa reteta ajunge la voi, cei care ma cititi, si vreau sa va multumesc ca ma vizitati.

Reteta salatei de azi am vazut-o intr-o revista, si am omis ce nu mi-a placut (pieptul de pui) si am adaugat ceva ce am crezut ca o sa se potriveasca (ceapa). Mi-ar fi placut sa folosesc rucola, dar nu am gasit la magazin (se pare ca nu am cautat unde trebuia).


Salata cu mango si pastai de mazare

Ingrediente:

o mana de andive, rucola sau chiar salata verde sau spanac
1/2 cana castravete tocat mai mare
1/2 cana mango tocat mai mare
1 cana teci de mazare proaspata, curatata de ate
1/2 ceapa rosie taiata rondele (daca ceapa este foarte mare, folositi un sfert)
2-3 linguri de seminte de muguri de pin (daca nu aveti, inlocuiti-le cu nuci obisnuite)

Se pune o cratita mica cu apa la fiert. Cand apa fierbe, se pune mazarea, si se lasa 4 minute, apoi se scoate si se transfera in apa cu gheata sa se raceasca. Se scurge, apoi se amesteca cu andivele, mango, castravetele si ceapa. Se toarna dressingul deasupra si se amesteca. Se serveste presarata cu seminte de pin.

Pentru dressing:

1 lingurita ghimbir dat pe razatoare
1 lingurita sos de soia
zeama de la 1 lamaie verde
sare si piper dupa gust
4 linguri de ulei de masline

Se amesteca ghimbirul, sosul de soia, zeama de lamaie verde, sare si piper. Se amesteca cu telul si mestecand mereu se adauga uleiul in fir subtire, pana cand este tot incorporat.

Se poate testa dressingul intingand cu putina mazare sau andive in ea.

Se asambleaza chiar inainte de servire, pentru ca andivele se vestejesc repede.

Pofta buna!


A friend asked me once where I get my ideas from. From all over. From TV or from some magazine. From over internet, or some old Romanian recipes that I would like to have it again. Sometimes the idea comes like a revelation, when I’m at work. Or it comes after some thinking what to do with ingredients that I already have in the fridge.

If I already have the recipe, I make it or I change it a little, after my taste, or after the ingredients I have. If I only have the ingredient, I look online for a recipe, or I combine several recipes.

The cooking day comes. Most of the times I come out victorious. Sometimes I don’t. Or the result is not good enough to end up on the blog.

After cooking is plating, for picture (I taste the food, of course) and I look for a good place for the picture. Maybe little staging. I take the pictures, and what do you think it comes next? I eat!

The pictures wait nicely in the computer until I have time to post it, time when I already know what I’m going to write, but most of the times I write the title and I stare at the screen for few minutes until I start.

And that way the recipe ends up on my blog, where you can see it, and I want to thank you all for visiting.

I got today’s recipe from a magazine, I skipped what I didn’t like (chicken breast) and I added something that I thought it fits in there (onions). I would’ve liked to use some arugula, but I didn’t find it in the store, apparently I didn’t look in the right place.

Mango and peapods salad

Ingredients:

1 cup of endives, arugula, or even lettuce or spinach
½ cup roughly chopped cucumber
½ cup roughly chopped mango
1 cup fresh peapods, strings cleaned
½ red onions, round sliced (if you have a large onion, use only a quarter)
2-3 tbsp pine nuts (it can be substituted with walnuts or other nuts that you like)

Bring a small pot with water to boil. When is boiling, add the peapods and boil for 4 minutes. Remove and drain. Place the peapods in ice bath to stop cooking. Drain again, and mix with the other ingredients.

Drizzle the dressing on top and toss. Serve with pine nuts.

For the dressing:

1 tsp grated fresh ginger
1 tsp soy sauce
The juice from 1 lime
Salt and pepper after taste
4 tbsp olive oil

Mix the ginger, soy sauce, lime juice, salt and pepper and whisk to combine. Keep whisking and add the oil, little at a time, until is all incorporated.
You can taste the dressing, dipping some peapod or some endive in it.

Ensemble the salad just before serving, the endives will wilt very fast.

Enjoy!

September 23, 2010

Pui calit rapid cu legume/ Stir fry Chicken


(Please scroll down for English version)

Calirea rapida este o metoda de gatit chinezeasca. De obicei se face intr-un wok, o tigaie in forma sferica, care permite o suprafata incinsa mai mare. Gatirea in wok se face la temperatura foarte mare, care trebuie pastrata pe toata durata coacerii. Daca nu aveti wok, puteti folosi o tigaie obisnuita, dar aveti in vedere ca trebuie sa fie deajuns de mare sa incapa in ea toate legumele, si trebuie sa si amestecati.

Aceasta reteta este foarte rapida, mi-a trebuit mai mult timp cu pregatirea ingredientelor, totul trebuie sa fie taiat si tocat, gata de pus in tigaie inainte de a incepe.


Nu as putea spune ca este o reteta autentica chinezeasca dar se apropie foarte mult. Eu am folosit ce legume am avut prin frigider, si se pot substitui cu ce va place: ciuperci, broccoli, fasole verde.

De asemenea, eu am servit cu orez jasmine (iasomie), dar un orez alb obisnuit este bun, sau daca sunteti la dieta, sariti orezul.

Sa va spun ce fac eu cu ghimbirul cand cumpar si nu il folosesc pe tot in decurs de 1-2 saptamani: il curat de coaja si il tai bucati mai mici. Il pun intr-o punga cu fermoar in congelator, si il folosesc in ceaiul de dimineata, rad putin ghimbir congelat, ii da o aroma foarte buna.

Sa trecem la treaba:

Ingrediente:

1 lingura de usturoi tocat marunt
1 lingura ghimbir proaspat tocat marunt sau dat pe razatoare
3-4 linguri ulei (eu am amestecat ulei de susan si ulei de floarea soarelui, nu e bun uleiul de masline pentru ca se va arde)
1 piept de pui fara os si fara piele, taiat in cubulete de 2 cm
1 cana varza tocata
1 ardei gras rosu taiat in bucati de 2 cm
1/2 cana teci de mazare (congelate sau proaspete)
3-4 fire ceapa verde, taiate bucati de aprox 2 cm
3-4 linguri sos de soia
seminte de susan pentru decor (optional)
1 cana orez fiert (optional)
sare si piper, dupa gust (sosul de soia este deja sarat)

Se presara bucatile de pui cu putina sare si piper.

Se incinge uleiul in wok, la foc mare, pana cand incepe sa fumege putin (nu sa se arda). Se adauga ghimbirul si usturoiul, si se lasa 30 de secunde, mestecandu-se mereu.

Se adauga puiul si se mesteca in continuu, fie cu lingura, fie scuturand tigaia, pana cand puiul este alb pe toate partile.

Se adauga legumele si se mesteca in continuu, pentru 10-15 minute, depinde cat este focul de mare (focul meu nu a avut putere sa tina wok-ul foarte incins pe toata durata gatirii).

Se presara sosul de soia si se opreste focul. Se verifica de sare si piper.

Pentru servit, se aseaza puiul si legumele pe pat de orez, se presara o lingura de sos de soia si seminte de susan daca folositi.

Pofta buna!


Stir-frying is a Chinese cooking method, which is usually made in a wok. A wok is a hemisphere shape pan, which allows a bigger cooking surface. Stir-frying is made at a high temperature, kept at all cooking time. If you don’t have a wok, you can use a regular pan, big enough to keep all the ingredients and to have room for stirring.

This recipe is very fast, it needs more preparation than cooking time. Everything has to be ready to go in the pan before start cooking.

I couldn’t say is an authentic Chinese recipe, but its close enough. I used whatever vegetables I had in the fridge, and you can substitute with whatever you like: broccoli, mushrooms, and green beans.

I also served it with jasmine rice, but you can use any kind of rice you like. Or, if you’re on a diet, skip the rice.

Let me tell you what I do with the fresh ginger, when I don’t use it in a week or two: I clean it, cut in smaller pieces and place it in a zipper bag in the freezer. I grate some frozen ginger in my morning tea; it gives it a special flavor.

Ingredients:

1 tbsp chopped garlic
1 tbsp chopped or grated fresh ginger
3-4 tbsp oil (I mixed sunflower oil with sesame oil, I wouldn’t use olive oil for stir-frying, it has a low smoking point)
1 chicken boneless skinless chicken breast cut in 1 inch cubes
1 cup chopped cabbage
1 red bell pepper cut in 1 inch squares
½ cup peapods, frozen or fresh
3-4 green onions cut in 1 inch pieces
3-4 tbsp soy sauce
Sesame seeds for decoration (optional)
1 cup boiled rice (optional)
Salt and pepper after taste (the soy sauce is salty)

Sprinkle little salt and pepper on the chicken pieces.

Heat the oil in the wok, on high heat, until it starts smoking a little. Add the ginger and the garlic, and stir for 30 seconds. Add the chicken, and stir continuously, either with a spoon or shaking the wok, until is getting white on all sides.

Add the vegetables and keep stirring, for 10-15 minutes, depends on how high is the heat (my stove didn’t have enough strength to keep it very hot all the time).

Drizzle some soy sauce and remove from heat. Check for salt and pepper.

For serving, place the stir fry on top of rice, drizzle one tablespoon of soy sauce on top, and sprinkle sesame seeds, if using.

Enjoy!

Triunghiuri cu ricotta/ Mini ricotta triangles


(Please scroll down for English version)

Provocarea lunii septembrie la "Vinerea foarte dulce" a fost: deserturi dintr-o imbucatura. Ceva dulce, vegetarian, care sa fie mancat dintr-o bucata (sau 2). Dupa putin "brainstorming" cu prietena mea, Mariya, am decis sa fac aceste triunghiuri cu aluat foietaj si branza ricotta.

Au iesit delicioase, singura mea problema (fiind prima data cand le fac) a fost ca umplutura a curs putin. Am folosit aluat cumparat. Am in plan in viitor (mai indepartat :)) sa incerc sa fac aluat in casa, deocamdata am folosit cumparat.

Incepe sa imi placa "Vinerea foarte dulce", ma face sa ma gandesc si sa inventez ceva, si abia astept provocarea lunii viitoare.

Ingrediente:

2 foi de aluat foietaj (cumparate sau facute in casa)
unt pentru uns tava
1 cana (250 ml) branza ricotta
2 linguri de zahar
2 oua
1/4 cana afine (proaspete sau congelate)
vanilie

Daca aluatul este congelat, se lasa sa se dezghete in frigider, sau la temperatura camerei (dupa instructiunile de pe pachet).

Se incinge cuptorul la 200 grade Celsius (400 Fahrenheit).

Pentru umplutura, se amesteca ricotta cu zaharul si 1 ou, pentru 1-2 minute pana cand se topeste zaharul si mixtura devine cremoasa. Se adauga vanilia si afinele, se amesteca pana cand se incorporeaza.

Se unge o tava cu unt sau se tapeteaza cu hartie de pergament.

Se presara putina faina pe o plansa si se intinde o foaie de aluat si se taie in patrate cu latimea de aprox 5-6 cm. Se pune o lingurita de umplutura in mijlocul patratului.


Se ia unul din colturi si se indoaie peste coltul opus, obtinandu-se un triunghi. Se lipesc usor marginile si se apasa pe margini cu varful unei furculite.

Se aseaza in tava, si la fel se procedeaza cu restul de aluat.
Se bate un ou cu putina apa, si cu o pensula se ung toate triunghiurile.


Se baga in cuptorul incins pentru 15-20 minute, pana cand se rumenesc.

Pofta buna!


The September theme for “Sugar High Friday” was: One bite desserts. Something sweet, vegetarian, that can be eaten in one bite (or two). After little brainstorming with my friend Mariya, I decided to make these mini triangles with puff pastry and ricotta cheese.

The triangles turned out delicious, my only problem (being the first time I made it) was the filling came out a little bit. I used store bought puff pastry. I’m planning in the future to make my own puff pastry, but for now I used store bought.

I start liking “Sugar High Friday”, it makes me think and invent something, and I can’t wait for the next month challenge.

Ingredients:

1 package puff pastry (2 sheets)
Butter for greasing the baking sheet
1 cup ricotta cheese
¼ cup sugar
2 eggs
¼ cup blueberries (fresh or frozen)
Vanilla extract

If the puff pastry is frozen, follow the package instruction for defrosting.

Preheat the oven at 400 degrees.

For the filling, mix the ricotta with the sugar and 1 egg, for 1-2 minutes until the sugar dissolves and the mixture becomes creamy. Add the vanilla and blueberries and mix only until incorporated.

Grease a baking sheet with butter or line with parchment paper.

Sprinkle a little flour on a board and spread one puff pastry sheet. Cut in squares of 2-2.5 inches. Place one teaspoon of filling in the middle of one square. Lift one corner and fold over the opposite corner, and we have a triangle. Press together the edges and press it with a fork.

Place in the baking sheet. Repeat with the rest of the squares.
Beat the remaining egg with little water and brush the triangles with the mix.

Place in the preheated oven for 15-20 minutes, until golden brown and delicious.

Enjoy!

September 17, 2010

Salata cu fasole verde si branza Feta/ Feta and green beans salad


Pentru ca imi place fasolea verde, mi-am facut provizii de la o ferma din apropiere (pe langa alte multe legume). Am spalat pastaile, le-am curatat numai de codita, le-am lasat sa se zvante putin si le-am pus in pungi cu fermoar si apoi in congelator. Cand o sa vreau sa gatesc, le pun din congelator direct in apa fiarta, si sunt gata de salata.

Reteta de azi am gasit-o cand cautam altceva pe site-ul Food Network, si mi-a placut foarte mult ideea de fasole verde si branza. Eu i-am adaugat cateva smochine, care au fost in sezon. Foarte dulci si moi, s-au potrivit bine cu branza sarata.

Ingrediente:

aprox 500 gr fasole verde proaspata (se poate folosi congelata)
1/2 ceapa verde taiata rondele (eu am avut o ceapa foarte mare)
1 cana nuci (250 ml)
1 cana branza Feta (250 ml)
4-5 smochine proaspete, taiate in sferturi

Pentru dressing:

1/2 lingurita sare
piper proaspat macinat
otet (4 linguri)
ulei de masline extra virgin (aprox 8 linguri)

Cantitatile sunt aproximative, pentru ca nu le masor. Uleiul ar trebui sa fie dublul otetului.

Se amesteca sarea, piperul si otetul intr-un castronel si se bat cu telul, se adauga uleiul in fir subtire, batandu-se in continuu, pana cand tot uleiul este incorporat.
Pentru a testa dressingul, se intinge cu o bucatica de fasole in dressing, si se gusta.

Se opareste fasolea: se pune o oala cu apa la fiert. Cand incepe sa fiarba, se pune fasolea si se lasa 5 minute, pana cand este patrunsa putin, dar nu prea moale. Se scoate si se pune in apa cu gheata, sa se opreasca fierberea, si apoi se scurge.

Pentru a coace nucile, se incinge cuptorul la 180 grade Celsius (350 Fahrenheit). Se pun nucile intr-o tava intr-un singur strat si se tin la cuptor 10-15 minute, pana cand se rumenesc.

Se asambleaza salata: intr-un bol se pune fasolea, ceapa, nucile si smochinele. Se presara deasupra dressingul, si se amesteca. Se serveste cu branza faramata deasupra.

Sper ca o sa va placa la fel de mult ca si mie!


Because I like green beans, I made a little stock for the winter from a neighborhood farm (along with other nice vegetables). I washed the beans, I cut only the stem, let them dry a little and place the beans in plastic zipper bags and after that in the freezer. When I’m going to be in a mood for some green beans, I’ll just place them in boiling water, and they’re ready for salad.

I found today’s recipe when I was looking for something else on The Food Network website, and I liked the idea of pairing the green beans with Feta cheese. I also added some figs, it’s their season. Being sweet and soft, they were great with the saltiness of the cheese.

Ingredients:

About one pound of fresh green beans (frozen can be also used)
½ red onion sliced (I had a large onion)
1 cup walnuts
1 cup Feta cheese
4-5 fresh figs cut in quarters

For the dressing:
½ tsp salt
Fresh ground pepper
White wine vinegar (or cider vinegar) about 4 tbsp
Extra virgin olive oil (about 8 tbsp)

The quantities are approximate, I didn’t measure. The oil should be the double of the vinegar.

Whisk the salt, pepper and vinegar. Add the oil, little at a time, whisking continuously.
To test it, dip a piece of green bean in the dressing and taste it.

To blanch the green beans, place a pot with water on medium heat. When the water is boiling, add the green beans and boil for 5 minutes. Remove the beans and place them in an ice water bath, to stop boiling. Drain and set aside.

To roast the walnuts, preheat the oven at 350 degrees. Place the walnuts on a sheet pan and place them in the oven for 10-15 minutes until golden brown.

To make the salad, place the green beans, onion, walnuts and figs. Drizzle the dressing and toss. Serve with crumble Feta cheese.

I hope you enjoy it as much as I did!

September 15, 2010

Sandvisuri cu vinete/ Eggplant sandwiches


Sandvisurile calde, alaturi de o supa calda sunt pranzul perfect pentru americani. Eu nu fac sandvisuri foarte des, dar acestea au fost asa de bune, incat merita incercate.

Ideea pentru sandvisuri mi-a venit la un picnic, unde una din prietene, vegetariana fiind, a mancat numai vinete pe gratar. M-am gandit sa integrez vinetele coapte in sandvisuri. Primul sandvis este idee personala, un sandvis vegetarian. Cel de-al doilea este o derivatie de la un sandvis clasic american: BLT (Bacon, Lettuce and Tomato) adica in traducere: costita afumata, salata verde si rosii.

Cand fata care imi facea pregatirea in prima zi la restaurant tot zicea "BLT", habar nu aveam ce inseamna, dar am aflat destul de repede. Si cand l-am si incercat, mi-a placut foarte mult. Combinatia de costita afumata sarata si legume proaspete este delicioasa.

Prepararea vinetelor:

O vanata medie, se spala si se taie felii rotunde cu grosimea de aprox 1 cm. Se pun pe un tocator si se presara cu multa sare. Se lasa 15 minute, timp in care sarea va extrage sucul amar si vinete. Vinetele se spala sub jet de apa si se tamponeaza cu un servet. Se presara putin ulei de masline.


Se pun pe gratarul incins (se pot face si pe plita) pentru cateva minute pe fiecare parte, pana cand se rumenesc. Se iau si se dau deoparte.

Pentru primul sandvis am folosit ceapa coapta: o ceapa medie curatata de piele si taiata rondele putin mai subtiri decat vinetele. Ceapa am dat-o si pe ea cu putin ulei si am copt-o impreuna cu vinetele (un cleste de bucatarie este foarte bun pentru apucat ceapa cand se intoarce). Eu nu am avut ardei grasi in acea zi, dar daca aveti, coaceti si un ardei. Cateva felii de ardei copt se imperecheaza foarte bine cu vinetele.


Sandvis vegetarian (pentru 1 sandvis):


2 felii de paine (de orice fel doriti, eu am folosit foccacia taiata jumatate)
1 lingura de maioneza din borcan
2 felii de vinete coapte ca mai sus
2 felii de ceapa coapta
2 felii de rosie taiata rondele

Se ung feliile de paine cu maioneza, si se asambleaza sandvisul. Inainte de a se pune felia de paine deasupra se presara putina sare.

BLT cu vinete (pentru 1 sandvis):


2 felii de paine prajita (in prajitorul de paine sau pe plita)
1 lingura de maioneza
2 felii de costita afumata
2 felii de vinete coapte ca mai sus
2 felii de rosie taiata rondele
frunze de salata verde, andive sau chiar rucola sau spanac, orice verdeata aveti la indemana

Costita afumata se pune intr-o tigaie fara ulei, la foc mediu


si se prajeste, intorcandu-se pe ambele parti, pana cand toata grasimea este topita si costita este crocanta. Se scoate pe un servetel sa mai absoarba din grasime.


Fiecare felie de paine se unge cu maioneza, apoi se asambeaza: frunzele de salata verde, vinetele, rosia si costita, apoi cea de-a doua felie de paine. Nu este nevoie de sare, costita fiind deajuns de sarata.

Pofta buna!


Warm sandwiches, along a hot soup are a perfect American lunch. I don’t make sandwiches very often, but these are so good, it’s worth to give it a try.
The idea came to me at a picnic, when one of my friends, because she’s vegetarian, had only grilled eggplants. I thought to integrate the grilled eggplants in some sandwiches.

First is a personal idea for a vegetarian sandwich. The second one is a twist on an American classic: BLT or bacon, lettuce and tomato.

When the girl that trained me in my first day at the restaurant, kept saying “BLT”, I had no idea what that was. I found out pretty soon, and when I had it, I loved it. The combination between salty bacon and fresh vegetables is delicious.

Prepare the eggplant:

Clean one medium eggplant and slice it ½ inch thick. Place the eggplant sandwiches on a board or on a rack and salt them abundantly. Let sit for 15 minutes, the salt will extract the bitterness out of the eggplants. Rinse and pat dry. Drizzle with a little olive oil. Place the eggplant on a hot grill (outside or inside), for few minutes on each side, until golden brown. Remove and set aside.

For the first sandwich I used grilled onion: I cleaned one medium onion, and I sliced it almost as thick as the eggplants. I drizzled some olive oil and I grilled it in the same time with the eggplant. I didn’t have bell peppers that day, but if you like it, grill some pepper slices too, they pair very nice with the eggplant.

Vegetarian sandwich (makes 1):


2 slices of bread of your liking (I used foccacia)
1 tbsp jarred mayo
2 grilled eggplant slices
2 grilled onion slices
2 fresh tomato slices

Spread the mayo on the 2 slices of bread, and ensemble the sandwich. Before you put the top slice of bread, sprinkle little salt.

Eggplant BLT (makes 1):


2 toasted slices of bread
1 tbsp jarred mayo
2 slices of bacon
2 grilled eggplant slices
2 fresh tomato slices
Few lettuce leaves (you can also use endive, arugula or spinach)


Place the bacon in a pan, and fry until crisp. Remove and place on a paper towel to drain the excess fat.

Spread the mayo on the bread, and ensemble the sandwich: lettuce, eggplant slices, tomato and bacon. There is no need for salt, the bacon is salty enough.

Enjoy!

September 09, 2010

Fasole verde si usturoi in doua feluri/ Green beans and garlic two ways


(Please scroll down for English version)

Imi place fasolea verde, si incerc sa gasesc cat mai multe feluri de a o gati. De obicei folosesc proaspata (e buna si congelata), niciodata conservata. Imi place sa fie putin crocanta cand o mananci. Una din retetele de azi este o reteta olteneasca din cartea lui Radu Anton Roman: "Bucate, vinuri si obiceiuri romanesti". Cea de-a doua varianta este inspirata de o reteta cu spanac dintr-o revista "Food Network Magazine".

Pentru amandoua retetele am folosit aprox 1 kg pastai de fasole verde, curatate de codite si oparite: se pune apa la fiert, cand incepe sa fiarba se pun pastaile pentru 5 minute, cat sa se patrunda si sa isi pastreze culoarea. Se scot si se pun in apa rece cu cuburi de gheata. Se scurg si se dau deoparte.

Varianta 1:

Ingrediente:

500 gr fasole verde oparita
4-5 catei de usturoi
sare si piper dupa gust
3-4 linguri ulei de masline
1 lingura de otet (optional)
1/2 cana iaurt
marar tocat (eu nu am avut cand le-am facut, dar sunt convinsa ca le da un gust foarte bun)

Cateii de usturoi se curata si se dau prin razatoarea mica. Se presara putina sare si se freaca cu o lingura de lemn, turnandu-se uleiul putin cate putin, pana cand se face o pasta. Se adauga otetul (daca va place mai acrisor), iaurtul si se condimenteaza cu sare si piper dupa gust.
Se amesteca cu pastaile si se presara deasupra marar.

Sa aveti pofta!

Varianta 2:


500 gr fasole verde oparita
3-4 linguri ulei de masline
8 catei de usturoi (mai maruntei daca se poate)
sare si piper dupa gust
2 linguri de seminte de susan prajite (modul de prajire il puteti vedea
aici)

Se incinge uleiul intr-o tigaie si se pun cateii de usturoi intregi. Se lasa sa se rumeneasca putin, intorcandu-se, cam 2 minute. Se adauga fasolea verde, si se lasa 3-4 minute, timp in care se condimenteaza cu sare si piper.
Se opreste focul, si se serveste cu seminte de susan presarate deasupra.

Pofta buna!


I like green beans and I try to find different ways to cook it. I use fresh green beans (frozen work well too), never from the can. I like it to be little crunchy when I eat it. One of the today recipes are from the south part of Romania (where I’m from) and it's inspired from Radu Anton Roman’s cookbook “Romanian foods, wines and traditions”. The second recipe is inspired by a spinach recipe from The Food Network Magazine.

For both recipes I used about 2 pounds of green beans, cleaned and blanched: put a pot with water to boil, and when it starts boiling drop the green beans in the boiling water for about 5 minutes. Transfer the green beans in cold water with some ice cubes. Drain and set aside.

1st Way (for the garlic lovers):


Ingredients:

1 pound blanched green beans
4-5 cloves of garlic
Salt and pepper after taste
3-4 tbsp olive oil
1 tbsp white vinegar (optional)
½ cup yogurt
Chopped fresh dill (I didn’t have that day, but I’m sure the dill will bring a nice touch to the party)

Clean the garlic and grate them on the small grater. Place them in a little bowl. Sprinkle little salt and with a wooden spoon mix them, adding a little oil at a time, until the mixture turns into a paste.


Add the vinegar (if you prefer more sour), the yogurt and check for salt and pepper.

Pour over the green beans and sprinkle dill on top.

Enjoy!

2nd Way:


1 pound blanched green beans
3-4 tbsp olive oil
8 small garlic cloves (small cloves if it's possible)
Salt and pepper after taste
2 tbsp toasted sesame seeds (how to toast the sesame seeds you can see
here)

Heat the olive oil in a pan, and add the garlic cloves. Toast the garlic for about 2 minutes, turning them from time to time. Add the green beans and mix. Cook for another 4 minutes. Season with salt and pepper.

Turn off the heat. Place everything on a serving platter and sprinkle sesame seeds on top.

Enjoy!

September 08, 2010

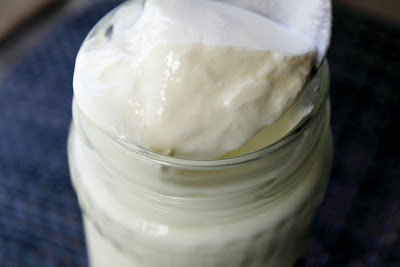
Iaurt de casa/ Homemade yogurt


(Please scroll down for English version)

Am inceput sa fac iaurt acasa in urma cu vreo 2 ani, dupa ce am citit cartea "Frantuzoaicele nu se ingrasa" a lui Mireille Guiliano. In carte, Mireille povesteste ca a invatat sa faca iaurt in una din calatoriile ei in Grecia, si a descris reteta cu iaurtiera si fara iaurtiera. Este o reteta simpla, si rezultatul este incomparabil cu cel cumparat din magazin.

Eu nu folosesc iaurtiera si imi place sa folosesc lapte organic integral. Pentru inceput este nevoie de putin iaurt simplu cumparat. Eu folosesc kefir, am incercat odata cu iaurt grecesc si nu s-a inchegat (iaurtul grecesc din magazin este gros si aduce mai mult a smantana). Dupa ce ati facut prima data iaurt, opriti din cel facut pentru runda urmatoare.

Imi place iaurtul simplu, sau sa il folosesc in loc de smantana ca garnitura la ciorba. Este foarte bun cu fructe, in special cu afine proaspete, sau cu miere. Combinatia cu miere mi s-a parut si mie putin ciudata prima data cand am auzit, dar merita incercata.


Ingrediente (pentru 2 borcanele de 400 ml):

800 ml lapte integral (masurati laptele in borcane)
2-3 linguri iaurt simplu cumparat (kefir)

2 borcanele curate si uscate, cu capac (daca folositi borcane mai mari, mariti cantitatea de iaurt)

Se incinge laptele intr-o craticioara pana cand incepe sa faca bule pe margine (nu se fierbe in clocot). Se opreste focul si se lasa laptele sa ajunga la temperatura camerei.

Se pune iaurtul intr-un castronel si se pune putin lapte racit, si se amesteca bine, amestecandu-se treptat in tot laptele, avand grija sa nu ramana parti de iaurt neamestecat.

Se toarna in borcane. Se lasa borcanele fara capac, acoperite cu un servet de bucatarie intr-un loc caldut pentru 8-9 ore sau peste noapte. Eu il las pe aragaz, aragazul meu are o lumina de veghe care tine aragazul mereu caldut. Se pot pune borcanele in cuptorul racit.

Dupa 8-9 ore iaurtul ar trebui sa fie legat si destul de tare. Se pun capacele la borcane si se pune in frigider. Se lasa sa se raceasca cateva ore si se poate consuma.

Pentru a face iaurt grecesc, se pune iaurt facut intr-o sita tapetata cu un servetel sau tifon, sita fiind sprijinita pe un castron. Se lasa cateva ore sau peste noapte in frigider, va rezulta un iaurt mult mai gros si gustos.


I started making homemade yogurt about 2 years ago, after I read Mireille Giuliano’s book: “French women don’t get fat”. In the book, Mireille is describing how she learned to make yogurt in one of her travels in Greece. She’s presenting the yogurt recipe with the yogurt maker and without a yogurt maker. Is an easy recipe, and the result is definitely better than store-bought.

I don’t use and yogurt maker, and I like to use organic whole milk. To begin you need a little good store bought yogurt. I use kefir (drinking yogurt). I tried once with Greek yogurt and it didn’t worked (store bought Greek yogurt is thicker and taste more like sour cream). After you made yogurt once, keep some for the next round.

I like plain yogurt, and I use it sometimes instead of sour cream. Is very good with fresh fruit, especially blueberries, or with honey. The honey and yogurt combination seemed a little odd to me first, but it’s worth to give it a try.


Ingredients (for 2 jars of 15 oz each):

30 oz whole milk (it can be measured in the jars)
2-3 tbsp plain store bought yogurt (kefir)

2 glass 15 oz jars with lid (if using larger jars, the ratio is about 1 tbsp yogurt for 1 cup milk)

Put the milk in a little pot and heat until it starts bubbling on the sides (don’t bring it to a boil). Turn off the heat and set aside until cools down to room temperature.

Put the yogurt in a bowl and add a little cooled milk, and stir to combine. Add more milk and stir, and turn everything back to the pot, making sure everything is well combined.

Pour into jars. Place the jars in a warm place, without lid, covered with a kitchen towel, for 8-9 hours or overnight. I keep it on top of the stove, my stove has pilot light, which keeps it warm. The jars can be placed on countertop as long as is warm inside the house (75 degrees or more), or inside cooled oven.

After 8-9 hours, the yogurt should be coagulated and thick. Put the lids on the jars and place in the fridge. Let cool for few hours and it can be eaten.

To make Greek yogurt, place the yogurt in a strainer with a piece of paper towel or cheese cloth inside. Hang the strainer on the edges of a bowl and place in the fridge for few hours or overnight, you’re going to have a very thick and tasty yogurt.


Enjoy!

September 06, 2010

Muschi de vita la gratar/ Grilled Rib-Eye Steak


(Please scroll down for English version)

Cat vremea ne mai permite un gratar, sa facem niste muschi de vita. Nu gatesc foarte des muschi de vita, dar reteta de azi merge la o petrecere, aniversare sau la o sarbatoare.
Imi place taietura "Rib-eye" (imi pare rau ca nu stiu echivalentul in romana), are mai multa grasime si va tine carnea mai frageda. Bucata mea a fost groasa de aprox 2,5 cm, si la 4 minute pe fiecare parte a fost mediu gatita, inca roz in mijloc. Daca folositi o bucata mai subtire, sau va place mai bine facuta, o tineti mai putin sau mai mult. Ideea cu saramura de dupa coacere este luata de la Nigella Lawson.

Ingrediente:

1 bucata de muschi de vita
sare si piper dupa gust
cateva linguri de ulei de masline pentru uns

Pentru saramura:

cimbru proaspat
2 catei de usturoi zdrobiti bine (pot fi lasati necuratati)
1/3 cana ulei de masline (80 ml)
zeama si coaja rasa de la o jumatate de lamaie
sare si piper

Se incinge si se curata gratarul. Se sterge cu un servetel inmuiat in ulei.

Carnea se scoate de la frigider cu aprox 15-20 minute inainte sa fie pusa pe gratar, nu trebuie "socata". Se da cu sare si piper si se unge cu ulei.

Se amesteca toate ingredientele pentru saramura intr-un vas intins.


Se pune carnea pe gratar, la foc mediu spre mare si se tine 4-5 minute pe fiecare parte, cu capacul de la gratar pus (pentru o bucata groasa de aprox 1 cm, se tine 3 minute pe fiecare parte).
Se ia carnea de pe gratar si se pune in saramura. Se mai lasa cate 4 minute pe fiecare parte sa isi ia aromele si sa se redistribuie sucurile din carne.

Se poate servi cu salata, cartofi sau legume. Pofta buna!


As long as the weather still allows grilling, let’s grill some steak. I don’t cook steak very often, but today’s recipe is good for a holiday, party or anniversary.

I like the Rib-Eye steak, it has some more fat than other cuts and it keeps the meat tenderer. My steak was 1 inch thick and at 4 minutes on each side cooking time it was cooked medium. If you have a thinner cut, keep it less time on the grill, or for more well done steak, increase the time at 5-6 minutes on each side. The soaking in juice idea I got it from Nigella Lawson’s show.

Ingredients:

1 Rib-Eye steak
Salt and pepper after taste
Few tbsp olive oil for greasing the meat

For soaking:
5-6 springs fresh thyme
2 cloves of garlic, smashed (the skin can be left on)
1/3 cup olive oil
Zest and juice from ½ lemons
Salt and pepper

Preheat and clean the grill. Wipe the grates with a paper towel soaked in oil.

Take the meat out of fridge 15-20 minutes before placing on the hot grill (it shouldn’t be shocked). Season the steak with salt and pepper and drizzle with some olive oil.

Mix all the soaking ingredients in a large bowl.

Place the meat on the grill, on medium to high heat, 4-5 minutes on each side, with the grill lid on (for an ½ inch thick steak, grill for 2-3 minutes on each side).

Remove the steak from the grill and place it in the soaking mix. Leave it for another 4 minutes on each side, to soak the flavors and redistribute the juices.
Serve it with potatoes, vegetables or a salad.

Enjoy!

September 05, 2010

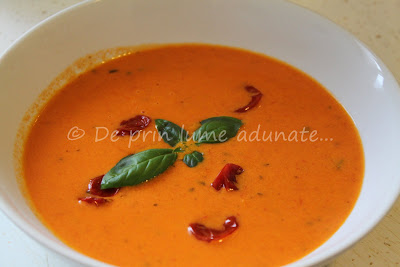
Supa crema de rosii coapte/ Roasted tomato soup


(Please scroll down for English version)

Toamna incepe sa isi faca incet incet simtita aparitia... a venit iara timpul uneia din supele mele preferate.

Dupa o reteta a lui Tyler Florence si modificata putin de mine, aceasta supa este perfecta pentru zilele care incep sa se raceasca, gradina cu rosii si legume este pe sfarsite, iar in casa miroase a paine proaspata si rosii coapte.

Ingrediente:

1 - 1 1/2 kg rosii proaspete amestecate (lungi, rotunde, mari, tip cireasa sau strugure)
1 ardei gras rosu (sau gogosar)
6 catei de usturoi curatati
2 cepe mici
1/2 cana ulei de masline (125 ml)
sare si piper dupa gust
4 linguri de unt
1 litru de supa de pui sau de legume
2 foi de dafin
frunze de busuioc si cimbru proaspete (se pot inlocui cu uscate)
1 cana de frisca lichida neindulcita (200 - 250 ml)

Echipament special: blender.

Se incinge cuptorul la mare 230 grade Celsius (450 Fahrenheit).

Rosiile, ardeiul si ceapa se taie bucati mari.
Se pun rosiile, ardeiul, ceapa si usturoiul pe o tava mare, intr-un singur strat, se condimenteaza cu sare si piper dupa gust si se presara uleiul de masline.
Se baga tava la cuptor aprox 30 minute pana cand legumele sunt rumenite.


Optional, pentru decor se pot opri cateva rosii cireasa coapte.

Se incinge untul intr-o oala, se adauga tot continutul tavii, supa si foile de dafin. Se fierbe 20-30 minute pana cand lichidul incepe sa scada putin.

Se scot foile de dafin, se adauga busuiocul si cimbrul, si se opreste focul. Se face supa piure cu blenderul, fie cu cel care se baga in oala, fie in cel cu cana, caz in care se lucreaza in cateva etape (atentie, va fi fierbinte).

In cazul in care ati folosit un blender cu cana, se pune supa inapoi in oala si se mai fierbe putin pe foc mic. Se potriveste de sare si piper. Se opreste focul, si se adauga incet frisca, cata doriti.

Apoi se savureaza decorata cu rosii, alaturi de o felie de paine calda si coaja crocanta.


The fall is coming, little by little… it's the time for one of my favorite soups.

After a Tyler’s Florence recipe and changed a little by me, this soup is perfect for the chilly days, when we’re picking the last vegetables from the garden, and inside the house smells like fresh baked bread and roasted tomatoes.

Ingredients:

2 ½ pounds mixed fresh tomatoes (plum, heirloom, cherry and vine tomatoes)
1 red bell pepper
6 cloves of garlic, peeled
2 small onions
½ cup olive oil
Salt and pepper after taste
4 tbsp butter
4 cups chicken or vegetable stock
2 bays leafs
Fresh basil and thyme leaves (you can substitute with dry)
1 cup heavy cream

Preheat the oven at 450 degrees.

Cut the tomatoes, pepper and onions in large pieces. Place the tomatoes, pepper, onions and garlic cloves on a large baking sheet, in one layer. Season with salt and pepper and drizzle with olive oil.

Roast the vegetables in the preheated oven for 30 minutes, or until caramelized.
Remove, and optional set aside few cherry tomatoes for garnish.

Heat the butter in a pot; add all the roasted vegetables, the stock and bay leaves. Bring to a boil, reduce heat and simmer for 20-30 minutes until the soup start reducing.


Remove the bay leaves and add the basil and thyme. Puree the soup using either an immersion blender or a regular blender. In this case, work in batches (be careful, it’s hot stuff).

If you used a regular blender, return the soup to the pot, and keep it on low heat. Check for salt and pepper. Turn off the heat and add the heavy cream, as much or as little you like.

Enjoy it decorated with roasted cherry tomatoes, along with some fresh crusty bread!

September 02, 2010

Pui Kiev/ Chicken Kiev


(Please scroll down for English version)

Se pare ca acest fel de a gati puiul vine de la Kiev. In mod traditional este un piept de pui batut, rulat cu unt si condimente, apoi prajit sau copt.

Varianta de azi are sparanghel, costita afumata sau prosciutto, si este copt, nu fiert. Se poate servi cu salata, cartofi, sau cu orice garnitura poftiti.

Ingrediente:

2 piepti de pui, taiati felii groase de 1/2 cm
8-10 felii de costita afumata, sau 4-5 felii de prosciutto, taiate jumatati
10 tulpini de sparanghel
1 cana faina
1 ou batut
1 cana pesmet
aprox 5 linguri de unt
sare si piper

Se pune o oala mica cu apa la fiert. Se incinge cuptorul la 180 de grade Celsius (350 Fahrenheit).

Sparanghelului i se rupe baza: se prinde cu o mana de baza si una de la jumatate, se indoaie usor si se va rupe singur acolo unde este fraged. La fel se fac toate tulpinile, sau se aliniaza dupa prima rupta si se taie cu cutitul.
Se taie tulpinile de sparanghel ramase in jumatati sau treimi, depinde cat sunt de lungi.

Se pun in apa care fierbe, aprox 3 minute, apoi se scot.

Feliile de pui se pun intre 2 foi de plastic (din cele cu care se acopera mancarea). Se bat cu ce aveti la indemana, ciocan de bucatarie, facalet :) pana cand sunt foarte subtiri.

Se aseaza faina, oul batut si pesmetul in 3 castronele, in ordine. Untul se taie in bucatele mici lunguiete.

Se ia o felie de pui batuta, se presara cu putina sare si piper (usor cu sarea, costita sau prosciutto sunt deja sarate), se aseaza deasupra 2 felii de costita una langa alta, sau o felie de prosciutto, apoi 2 bucatele de sparanghel de-a latul, o bucatica de unt, la un capat si se ruleaza. Se trece ruloul prin faina, apoi prin ou, apoi prin pesmet, si se aseaza cu terminatia in jos, intr-o tava unsa cu unt.

La fel se procedeaza cu restul de pui.
Se pune cate o bucatica de unt pe fiecare rulou si se baga in cuptorul incins pentru 20-25 minute, pana cand se rumeneste.


It seems like this chicken dish has the roots in Kiev. It’s traditionally a pounded chicken breast, rolled with butter and condiments, then fried or baked.

Today variation has asparagus, bacon or prosciutto, and it’s baked, not fried. It can be served along a salad, potatoes or any side dish you desire.

Ingredients:

2 boneless chicken breasts cut 1/3 inch thick slices
8-10 bacon slices, or 4-5 prosciutto slices, cut in halves
10 asparagus sticks
1 cup flour
1 egg, beaten
1 cup breadcrumbs
About 5 tbsp butter cut in small pieces
Salt and pepper

Place a small pot with water to boil, for steaming the asparagus. Preheat the oven at 350 degrees.

Remove the ends of the asparagus: place one hand at the base and the other at the half of the asparagus and bend. It’s going to snap in the right place, where is tender. Do the same with the rest of the asparagus, or align the bunch and cut after the first one.

Cut the pieces in halves or thirds, depends on how long they are.
Place in the boiling water for 3 minutes, remove and set aside.

Place one piece of chicken in between 2 pieces of plastic wrap. Beat them with a mallet until they’re very thin.

Place the flour, egg and breadcrumbs in 3 separate bowls, and place the bowls in a row.

Take one piece of chicken, season with salt and pepper (not too much salt, the bacon or prosciutto is already salted). Lay 2 strips of bacon side by side, or lay one slice of prosciutto. Place 2 asparagus tips crosswise and a small piece of butter and roll the chicken around the asparagus and the butter.

Dip the roll in flour, the in egg and then in breadcrumbs. Place in a butter baking dish, with the seam on the bottom. Do the same with the rest of the chicken slices.

Place one piece of butter on top of each roll. Place the dish in the preheated oven and bake for 20-25 minutes, until is golden brown.

Enjoy!

LinkWithin

Related Posts with Thumbnails